Dream Big, Build Smart

Have I mentioned the budget for this project?  The reality is, I can’t afford to have someone build the car for me and thankfully I prefer to do it myself anyway.  Buying the latest parts at full price is also out of the question.  So that means I try to find great deals and shop the sales as often as possible.  Buying excellent used parts is definitely in the cards and you meet some cool folks who are into the same stuff that way. 

Originally, I thought I’d set a realistic $20,000 budget which included the car and making it look good, drive great and ride well.  I easily could have done that with this car.  After buying the car, paying tax and taking care of the shipping, I still had nearly $5,000 to spend to make the “budget”.  But the more I thought about it, that seemed like such an arbitrary limitation and all too often leads to cutting corners and compromises. 

As a result, the budget approach just doesn’t work for me so I’m ditching it and going with a “cashflow” model that will allow me to optimize my spending as resources are available.  This approach will provide me with the ability to build the car the way I want, with the parts I want. No artificial limits or self-imposed restrictions. 

My overall philosophy for this project is pretty straightforward: 

DREAM BIG, BUILD SMART
Focus on the dream, plan accordingly and 
treat every purchase like an investment
 

This doesn’t mean I have the ability, means or desire to spend freely on this project.  Instead, it means I will manage costs by ensuring every part is well thought-out, fully researched and purchased for the best possible price – new or used. 

There are a lot of great vendors out there that I fully support and appreciate the sales they run, free shipping they offer and great service they provide.  I’m happy to provide them with my business in exchange for great prices and I’m hopeful they are still able to turn a reasonable profit along the way. 

So with my philosophy in place, it’s off to the Internet, time to start building relationships with the local businesses and scouring Craigslist for neighborhood deals.  I’ll try to provide updates on how well I’m doing along the way.  Wish me luck. 

Changing the Front Bumper

Project #1 – Swapping the front bumper – June 2011

I’m in the minority.  It seems like everyone loves the RS “split bumper” look on these cars.  These small bumpers are fine, but I prefer the full width bumper with the two small “bumperettes”, or fangs as some people like to call them. 

When I owned my blue 73, I went searching for a full width bumper and found one on Craigslist somewhere near Federal Way, WA.  I met the guy at his work and took a look at the bumper.  He claimed it was mint, but his definition of mint and my definiton of mint seem to be in different dictionaries.  As far as I know, nobody remanufactures the bumperettes for the front bumper so I still wanted it.  I ended up making him a low offer and we had a deal. 

I brought the bumper to Show Quality Plating in Seattle and had it re-chromed.  It turned out great.  The owner recommended that I paint the inside of the bumper to help reduce the risk of rust so my two oldest kids (Carson and Gage) helped me tape it all off and spray it silver. 

I used the bumper on my ’73 until the time I decided to sell it.  I put the bumperettes back on and kept the full width bumper for this project.

Swapping from the RS bumpers to the full width bumper is a piece of cake since they both use the same brackets.  It’s a matter of unbolting about 4 bolts, swapping bumpers and putting the bolts back in. 

I purchased some grade 8 quality bolts to attach the lower bumperettes to the front sheet metal in the original location/holes.   

Here are the photos from the swap:

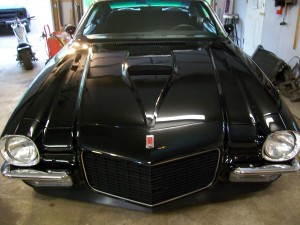
– Car came equipped with split bumpers on a non-RS nose
– Removing the RS style split bumpers is a piece of cake… about 4 bolts is all it takes.
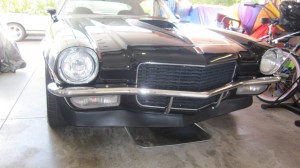
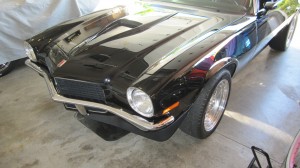
– Here’s the full width bumper installed, about an hour is all it takes with two “helpers” who were learning how to do this for the first time.
– I’m in the minority, but I like it!
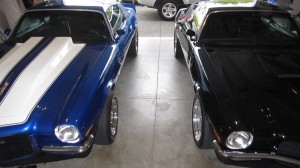
– Here are the cars side by side just before I sold the ’73 and after I did the bumper swap.

Getting Started

About a year ago I bought a 71 Camaro, you can read the story here on this site… speaking of this site, yesterday (June 20, 2012) I decided it would be fun to figure out how to create a web site to keep track of the the project build.

After a little experimenting, I decided to use WordPress.  After a few hours, I had a draft of my site up and running. Over the next few weeks I’ll update the content to reflect the work I’ve been doing on the car.

Hope you enjoy the site and I’d love to hear your thoughts on it or the car.  Thanks!